
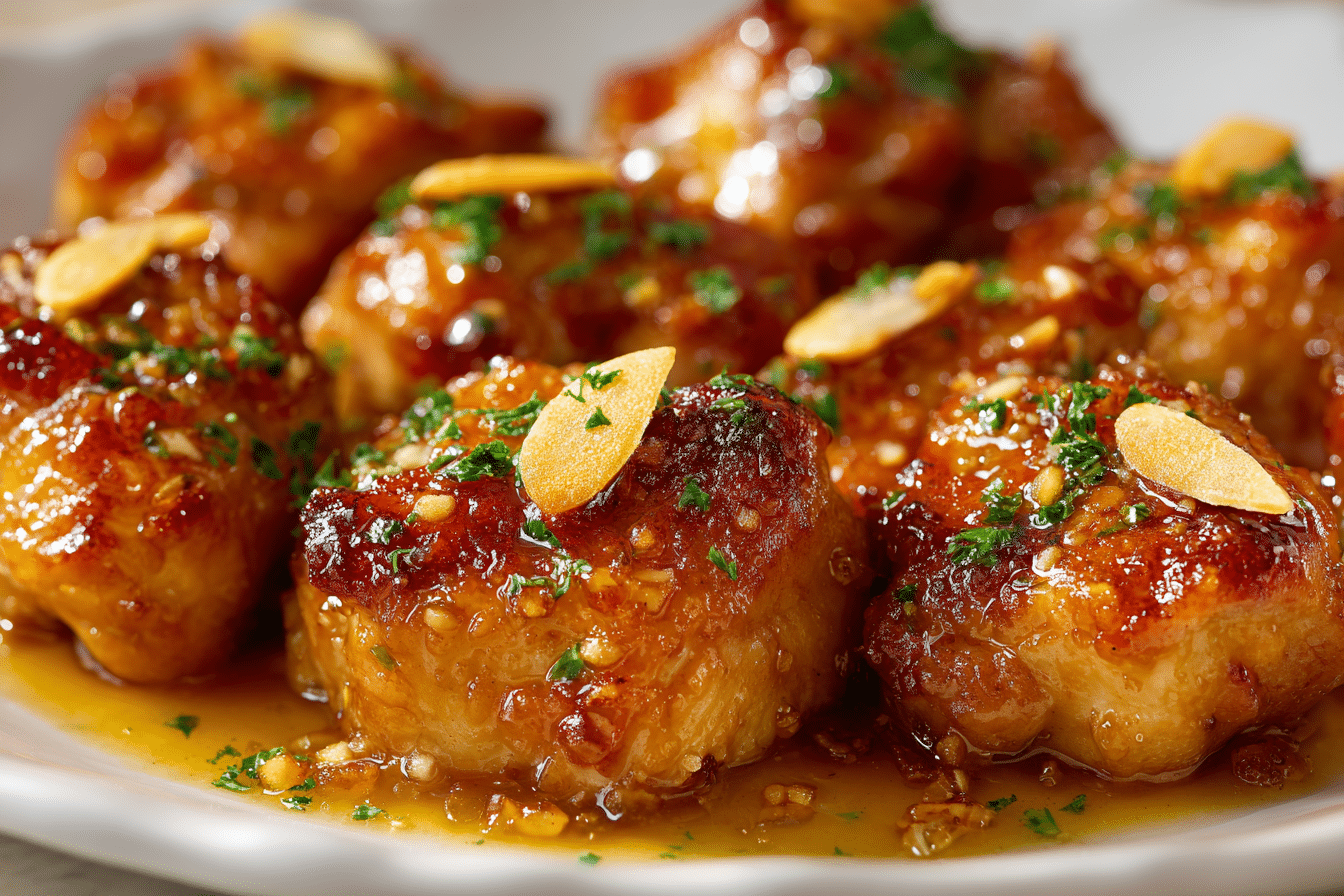
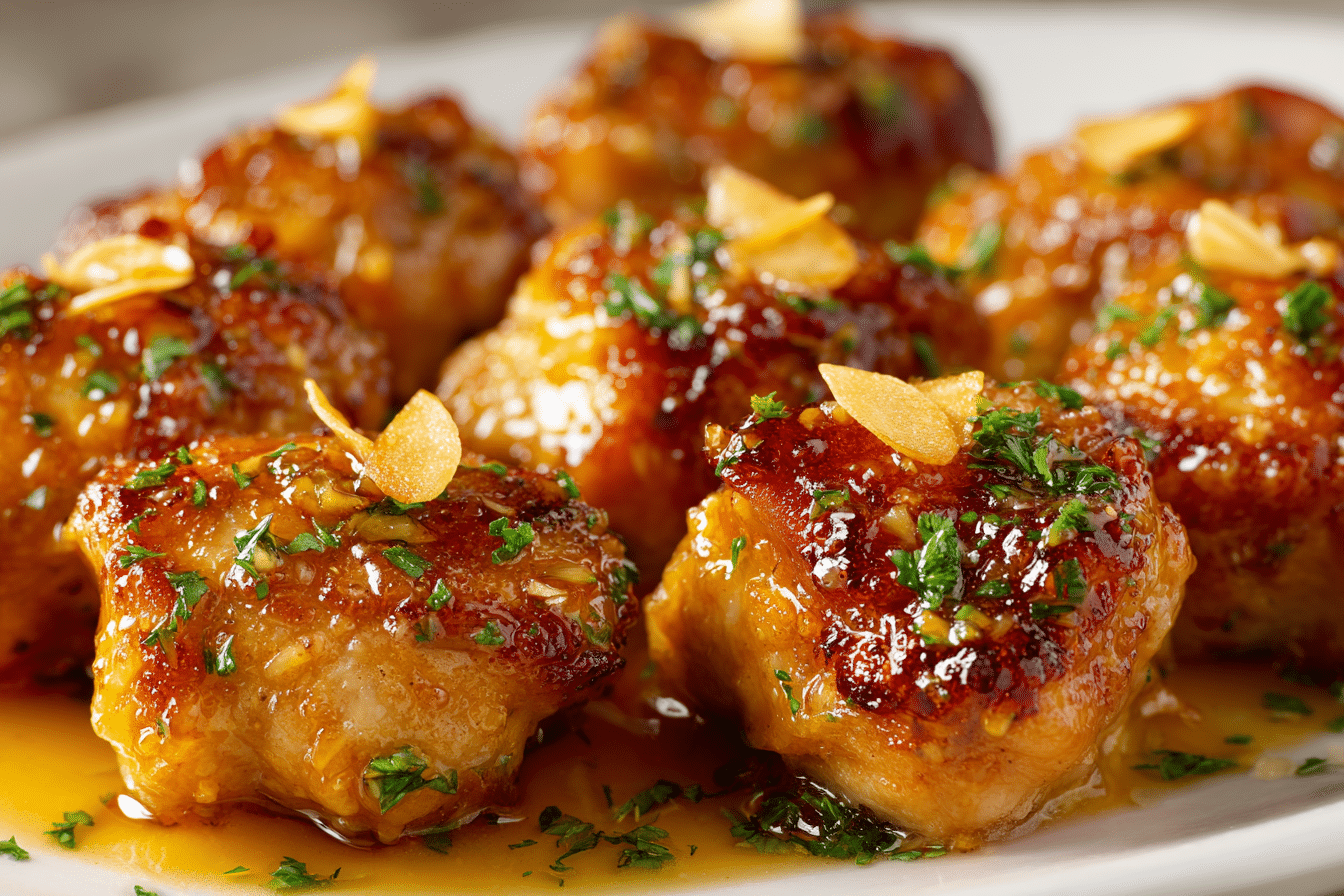
Honey Garlic Chicken Thighs are one of those reliable dishes that never fail to impress — easy to prepare yet deeply satisfying. Juicy, golden-brown chicken coated in a glossy, sticky glaze infused with honey, garlic, and soy creates a harmony of sweet and savory that’s incredibly hard to resist.
This recipe draws from Asian-inspired flavors commonly found in home cooking, where simple ingredients come together to create a comforting, restaurant-quality meal. The chicken develops a rich caramelized crust, while the sauce clings to every bite with just the right touch of sweetness and tang.
Whether you’re whipping up a quick dinner on a busy weeknight or planning ahead for flavorful meal prep, this dish delivers both convenience and mouthwatering results.
Ingredients Breakdown
Here’s a look at what goes into this recipe, why each ingredient matters, and how you can adapt it for your needs.
-
Chicken Thighs (with Bone and Skin): The perfect cut for this dish. They’re rich in flavor, stay moist during cooking, and crisp up beautifully. Boneless options work too, but bone-in thighs offer deeper flavor and a better texture contrast.
-
Honey: The glaze’s sweetness comes from real honey, which also helps create that sticky finish. Pure honey is best — not flavored or diluted syrups. For an alternate twist, try maple syrup or a sugar-free honey substitute.
-
Fresh Garlic: A must for bold, aromatic flavor. Grated or finely minced fresh garlic infuses the sauce with a savory base that complements the sweetness of the honey.
-
Soy Sauce: The salty, umami-rich element that balances the sweetness. Choose a low-sodium variety if you prefer a lighter salt profile. Gluten-free soy sauce, tamari, or coconut aminos are good substitutes.
-
Vinegar (Rice or Apple Cider): Brings acidity that brightens and balances the sauce. If neither is available, white wine vinegar is a solid replacement.
-
Sesame Oil (Optional): Adds a hint of nuttiness and richness, especially nice if you’re finishing the dish on the stovetop.
-
Red Pepper Flakes (Optional): A touch of heat enhances the flavor without overwhelming it.
-
Cornstarch Slurry (Optional): If you want the sauce to cling tightly to the chicken, a cornstarch slurry thickens it nicely.
Ingredient Notes
-
Dry the Chicken Well: This helps create a crisp sear when browning the skin.
-
Use Fresh, Not Jarred Garlic: The sharp bite of fresh garlic gives the sauce its distinctive flavor.
-
Warm Your Honey: If your honey is thick or crystallized, warm it gently to help it mix smoothly into the sauce.
Cooking Instructions – Step by Step
We’re using a skillet-to-oven method here to give the chicken that perfect texture: crispy on the outside, juicy on the inside, with a sticky glaze that brings everything together.
1. Prep and Season
Set your oven to 400°F (200°C). Blot the chicken dry with a paper towel, then season both sides lightly with salt and black pepper.
2. Brown the Chicken
In a heavy, oven-safe skillet, heat 1 tablespoon of a neutral oil over medium-high heat.
Place the chicken skin-side down and sear for 5–7 minutes without moving it. The skin should turn golden and begin to crisp.
Flip and cook the other side for 3–4 minutes to seal in the juices.
3. Combine the Sauce
In a small bowl, stir together:
-
1/3 cup honey
-
1/4 cup soy sauce
-
4 minced garlic cloves
-
2 tbsp vinegar
-
1 tsp sesame oil (optional)
-
Red pepper flakes to taste (optional)
4. Add Sauce and Bake
Pour the sauce into the skillet with the browned chicken, coating the thighs evenly.
Transfer the skillet to the oven and bake for 20–25 minutes, or until the chicken reaches 175°F (80°C) internally and the sauce is thickened and bubbling.
Baste the chicken with the sauce about halfway through to intensify the flavor and color.
5. Thicken the Glaze (Optional)
For a thicker sauce, take the skillet out after baking, remove the chicken, and simmer the sauce on the stovetop.
Stir in a slurry made from 1 teaspoon cornstarch and 1 tablespoon cold water. Let it cook for a few minutes until glossy and thick.
6. Let It Rest
Rest the cooked chicken for 5 minutes before serving. This helps the juices redistribute and keeps the meat tender. Garnish with green onions or sesame seeds if desired.
Helpful Tips, Variations & Substitutions
Expert Tips
-
Avoid Overcrowding the Pan: Give the thighs room to brown properly without steaming.
-
Marinate If You Have Time: Let the chicken sit in the sauce for a few hours beforehand to boost the depth of flavor.
-
Don’t Burn the Garlic: Once you add the sauce, monitor closely to ensure the garlic doesn’t overcook and turn bitter.
Easy Variations
-
Spicy Version: Stir in a spoonful of chili paste or hot sauce for an extra kick.
-
Ginger-Garlic Twist: Add freshly grated ginger for more complexity and warmth.
-
Hoisin Honey Garlic: Mix in a tablespoon of hoisin sauce for smoky-sweet undertones.
Dietary Swaps
-
Gluten-Free: Tamari or coconut aminos make this dish naturally gluten-free.
-
Low Sugar: Cut the honey by half or use a sugar-free honey substitute to reduce carbs.
-
Lighter Option: Remove the skin or switch to boneless, skinless thighs for a leaner take.
Perfect Pairings & Occasions
This dish is both casual and elegant — perfect for:
-
Busy weeknights with a bowl of steamed rice or stir-fried noodles
-
Sunday meal prep paired with roasted broccoli or quinoa
-
Family dinners served alongside buttery mashed potatoes or crisp green beans
-
Picnics or potlucks, since the chicken holds up well when reheated
It’s comforting, easy to prepare, and delicious enough for both everyday meals and special occasions.
Nutrition & Health Benefits
This flavorful recipe is more than just tasty — it also offers a fairly balanced nutritional profile:
-
Protein-Rich: Chicken thighs are an excellent source of high-quality protein, essential for energy and muscle recovery.
-
Healthy Fats: Skin-on thighs contain natural fats that enhance satiety. Trim extra skin if you’re watching fat intake.
-
Naturally Dairy-Free: No butter or cream required, making this suitable for lactose-free diets.
-
Simple to Adjust: Lower the honey for a lighter version, or bulk up the meal with high-fiber sides like roasted vegetables or brown rice.
This meal works well in a clean eating plan when portioned and paired with whole grains or greens.
Frequently Asked Questions
Q1: Can I swap in boneless chicken thighs?
Absolutely. Boneless thighs cook a little quicker — check for doneness after 15–18 minutes in the oven. They’re just as flavorful, though the lack of skin means you won’t get that same crisp texture.
Q2: What should I do if I don’t own an oven-safe skillet?
Just transfer the browned chicken and sauce to a baking dish after searing. Be sure the dish is deep enough to prevent the sauce from spilling as it cooks.
Q3: Is it possible to make this in a slow cooker?
Yes. While searing adds flavor, you can skip it for simplicity. Add everything to the slow cooker and cook on low for 4–5 hours or high for 2–3. For a thicker sauce, remove the lid during the last 30 minutes or stir in a cornstarch slurry.
Q4: How should leftovers be stored?
Cool completely, then refrigerate in an airtight container for up to 4 days. Reheat in a skillet over low heat or microwave with a splash of water to loosen the glaze.
Q5: Can I freeze this chicken?
Definitely. Place in a freezer-safe container with some of the sauce and freeze for up to 2 months. Thaw overnight in the fridge and warm gently on the stove.
Q6: What sides go best with this dish?
Go for anything that balances or absorbs the sauce — think jasmine rice, sautéed greens, roasted sweet potatoes, or sesame noodles.
Q7: My sauce came out thin. How can I fix it?
After baking, simmer the sauce on the stovetop until it reduces. For a quicker method, whisk in a cornstarch slurry and stir until the sauce thickens.
Print
Tender, pan-seared chicken thighs baked in a sticky honey garlic glaze. A sweet and savory dish that’s fast, flavorful, and perfect for any night of the week.
- Prep Time: 15 minutes
- Cook Time: 15 minutes
- Total Time: 30 minutes
- Yield: 4 servings 1x
Ingredients
-
6 chicken thighs (bone-in, skin-on)
-
Salt and pepper to taste
-
1 tbsp oil (neutral, like canola or avocado)
-
1/3 cup honey
-
1/4 cup soy sauce
-
4 garlic cloves, minced
-
2 tbsp rice vinegar or apple cider vinegar
-
1 tsp sesame oil (optional)
-
Pinch of red pepper flakes (optional)
-
1 tsp cornstarch + 1 tbsp water (optional)
-
Chopped scallions or sesame seeds for garnish
Instructions
-
Preheat oven to 400°F (200°C). Pat the chicken dry and season with salt and pepper.
-
In an oven-safe skillet, heat oil and sear chicken skin-side down for 5–7 minutes. Flip and cook for 3 more minutes.
-
Whisk together honey, soy sauce, garlic, vinegar, sesame oil, and red pepper flakes.
-
Pour sauce over chicken. Transfer skillet to oven and bake 20–25 minutes, basting once.
-
Optional: Remove chicken and simmer sauce with cornstarch slurry until thickened.
-
Let rest 5 minutes before serving. Garnish with scallions or sesame seeds.