
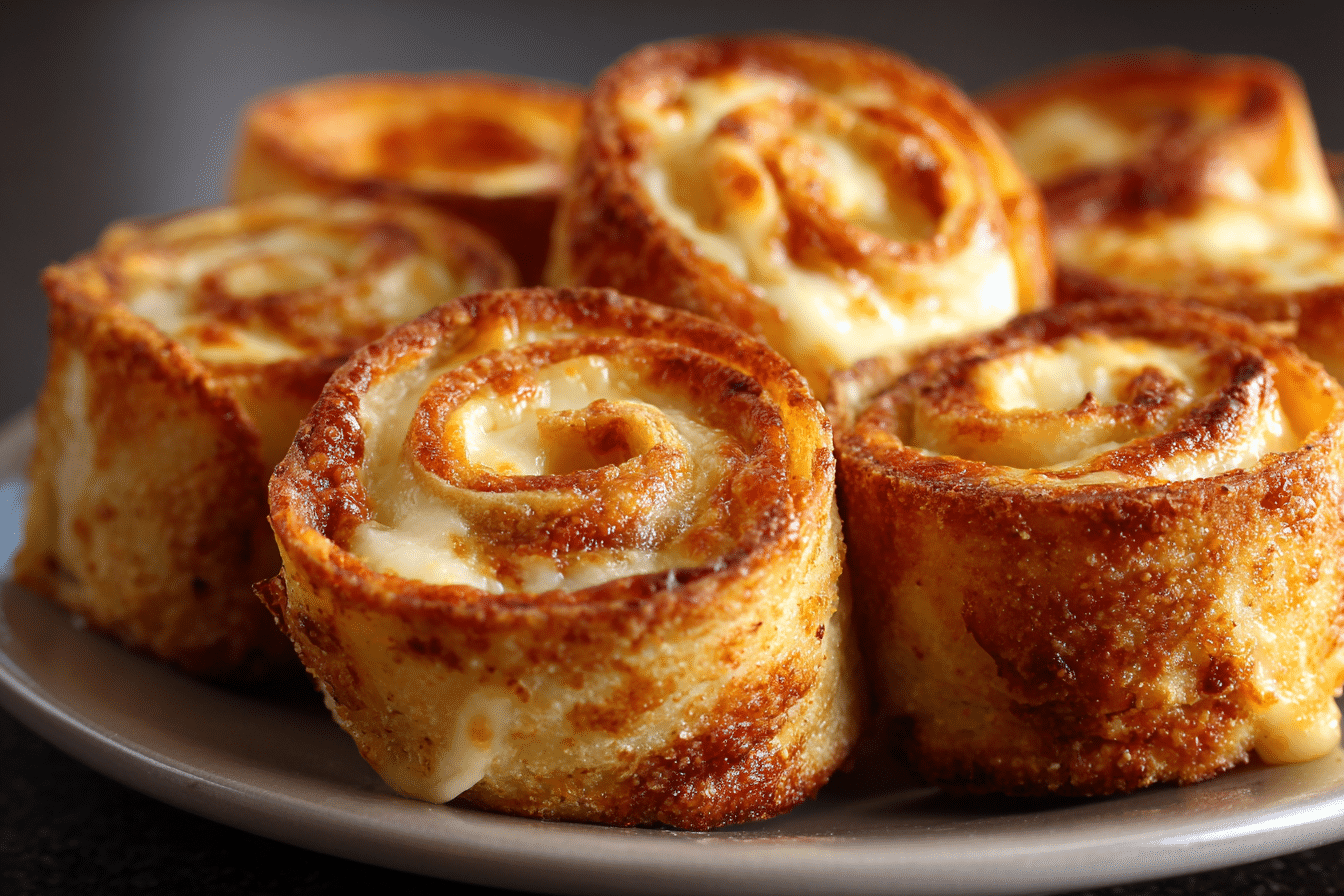
Grilled Cheese Roll-Ups transform the simple comfort of a classic grilled cheese sandwich into a fun, bite-sized snack that’s crispy on the outside and lusciously melted on the inside. Picture golden-brown bread encasing gooey cheese, with optional extras like ham, tomatoes, or fresh herbs adding bursts of flavor. Perfect for a quick lunch, a cozy dinner, or even as a party appetizer, these roll-ups take a beloved comfort food and turn it into a portable, irresistible treat.
Ingredients Overview
Cheese is the central star of Grilled Cheese Roll-Ups. Cheddar, mozzarella, or Monterey Jack provide excellent melting qualities and flavor. Cream cheese can be added for an extra layer of creaminess that balances the shredded cheese’s sharpness. The bread acts as the structural base; soft white sandwich bread is ideal, though whole wheat or sourdough can offer deeper flavor and a slightly firmer texture. Flattening the bread with a rolling pin prevents cracks and ensures smooth rolling.
Butter is essential for achieving a golden, crunchy exterior. Optional fillings such as ham, cooked bacon, spinach, or tomato slices add texture and flavor variety, while fresh herbs like basil, parsley, or chives offer a bright, aromatic touch. Simple substitutions can make the recipe more adaptable: use low-fat cheese and butter for a lighter version, or gluten-free bread to suit dietary needs.
The combination of ingredients creates a balance of textures and flavors: bread provides support, butter ensures crispiness, cheese gives creamy indulgence, and add-ins add extra taste and nutrition. With these fundamentals in place, the assembly and cooking process becomes intuitive, letting you customize the roll-ups while keeping their signature appeal intact.
Ingredients
8 slices sandwich bread
4 tablespoons butter, softened
1 cup shredded cheddar cheese
1 cup shredded mozzarella cheese
4 ounces cream cheese, softened
4 slices ham (optional)
1 small tomato, thinly sliced (optional)
1/4 cup fresh spinach leaves (optional)
1 teaspoon dried basil or Italian seasoning
Salt and pepper to taste
Step-by-Step Instructions
-
Begin by flattening each bread slice with a rolling pin until thin and pliable, ensuring it rolls without tearing.
-
Spread a layer of cream cheese evenly on each slice; this adds creaminess and helps the shredded cheese stick.
-
Sprinkle cheddar and mozzarella evenly across the cream cheese, reaching the edges for consistent melting.
-
Add any optional fillings like ham, tomato, or spinach. Season lightly with salt, pepper, and herbs.
-
Roll each slice from one end to the other, tucking the edges inward to keep fillings secure.
-
Heat 1 tablespoon of butter in a non-stick skillet over medium heat. Place the roll-ups seam-side down and cook 2–3 minutes per side until golden and crisp. Add extra butter as needed for even browning.
-
If the bread browns too quickly, lower the heat slightly. Cover the pan briefly to ensure the cheese melts evenly.
-
Remove from heat, let rest for a minute, then slice diagonally to reveal the gooey interior. Serve immediately.
-
For a baked alternative, place roll-ups on a parchment-lined baking sheet and bake at 375°F (190°C) for 10–12 minutes, turning halfway through.
Avoid overfilling, which can lead to leaks, and do not use high heat, which can burn the bread before the cheese melts. Proper flattening and medium heat yield the best results.
Tips, Variations & Substitutions
Try mixing different cheeses like gouda or provolone for a smoky, rich flavor. Swap ham for turkey, roasted vegetables, or mushrooms for a vegetarian-friendly version. Fresh herbs such as oregano or thyme bring fragrant notes, and a dash of garlic powder or paprika can add subtle spice.
For dietary adjustments, use gluten-free bread or substitute butter with olive oil. Ricotta can replace cream cheese for a lighter, creamy filling. Mini roll-ups are perfect for appetizers or snacks, and a brush of honey mustard or a sprinkle of Parmesan before cooking can enhance flavor. Keep the bread medium-thick and avoid overstuffing to maintain a crisp, golden exterior.
Serving Ideas & Occasions
Grilled Cheese Roll-Ups are ideal for lunch, snack time, or casual appetizers. Pair them with tomato soup for a classic comfort meal or with a fresh salad for a lighter option. They’re also perfect for movie nights, game-day snacks, or lunchboxes.
Beverages like iced tea, lemonade, or a chilled white wine complement the richness of the cheese. Bite-sized versions make excellent finger foods, and dipping sauces such as marinara, ranch, or honey mustard add variety. Their portability and satisfying textures make them a versatile, crowd-pleasing option for any casual occasion.
Nutritional & Health Notes
These roll-ups provide carbohydrates from bread, protein from cheese and optional meats, and fat from butter and cheese. Using whole-grain bread increases fiber and moderates glycemic impact, while adding vegetables boosts vitamins and minerals.
For lighter versions, use lower-fat cheese and butter alternatives. Including leafy greens or tomatoes enhances nutritional value. This combination of ingredients ensures that the dish can remain indulgent while also being adaptable for more health-conscious meals.
FAQs
Can I make Grilled Cheese Roll-Ups ahead of time?
Yes. Assemble the roll-ups in advance and refrigerate for up to 24 hours. Keep them tightly wrapped to prevent drying. Cook fresh in a skillet or oven just before serving for a crispy exterior and gooey interior. Freezing pre-cooked roll-ups is not recommended due to potential sogginess.
Can I freeze them?
Unbaked roll-ups freeze well. Wrap individually and store in an airtight container. Bake directly from frozen at 375°F (190°C) until cooked through and golden. Avoid prolonged thawing at room temperature to maintain texture. Freezing after cooking is not ideal.
Which cheeses are best?
Cheddar and mozzarella are ideal for melt and flavor. Monterey Jack, gouda, or provolone also work. Combining two or more cheeses creates a richer taste. Pre-shredded cheese with anti-caking agents may not melt evenly; freshly shredded cheese is preferable.
Can these be made vegetarian?
Yes. Omit meat and use vegetables like roasted peppers, mushrooms, or spinach. Combining multiple cheeses ensures a hearty, satisfying vegetarian option. Lightly season vegetables to avoid excess moisture.
How can I prevent them from falling apart?
Flatten bread evenly and don’t overfill. Roll tightly and tuck edges inward. Cooking seam-side down first and turning carefully keeps fillings secure.
Can they be baked instead of fried?
Absolutely. Place roll-ups on a parchment-lined sheet, brush with butter or oil, and bake at 375°F (190°C) for 10–12 minutes, flipping halfway. Baking yields crisp edges and melted cheese with minimal effort.
Are these kid-friendly?
Yes, they are ideal for children. Their small size, gooey cheese, and customizable fillings make them fun to eat. Bite-sized portions are great for lunchboxes or parties.
Print
Golden, crispy Grilled Cheese Roll-Ups filled with creamy cheese and optional savory add-ins. Perfect for snacks, lunches, or appetizers.
Ingredients
8 slices sandwich bread
4 tablespoons butter, softened
1 cup shredded cheddar cheese
1 cup shredded mozzarella cheese
4 ounces cream cheese, softened
4 slices ham (optional)
1 small tomato, thinly sliced (optional)
1/4 cup fresh spinach leaves (optional)
1 teaspoon dried basil or Italian seasoning
Salt and pepper to taste
Instructions
-
Flatten bread slices with a rolling pin.
-
Spread cream cheese on each slice.
-
Sprinkle cheddar and mozzarella evenly.
-
Add optional fillings; season with herbs, salt, and pepper.
-
Roll slices tightly and tuck edges inward.
-
Heat 1 tablespoon butter in a skillet over medium heat; cook seam-side down 2–3 minutes per side until golden.
-
Reduce heat if necessary; cover briefly to melt cheese.
-
Let rest 1 minute, slice diagonally, and serve warm.
-
Optional baked method: bake at 375°F (190°C) for 10–12 minutes, flipping halfway.